QuickStart 
Required data formats
There are few specifc requirements for the input data for PipeCraft.
- Paired-end data
must contain **R1** and **R2** strings in the paired-end files,
- sample names maynot contain ‘R1/R2’ strings
OK file names:
my_sample_01_R1_L001.fastqandmy_sample_01_R2_L001.fastqNOT-OK file names:
my_R1sample_01_R1_L001.fastqandmy_R1sample_01_R2_L001.fastqormy_sample_01_1.fastqandmy_sample_01_2.fastq
- index/barcodes file for demultiplexing:
- specific directory structure of NextITS pipeline
How to START
1. To START any analyses, you must specify the working directory (WORKDIR) by pressing the SELECT WORKDIR button. E.g., if working with fastq files,
then be sure that the working directory contains only relevant fastq files because the selected process will be
applied to all fastq files in the working directory!
Note
When using Windows OS, the selection window might not display the files while browsing through the directories.
After selecting a working directory, PipeCraft needs you to specify if
if the data is paired-end or single-end
and the extension of the data (fastq or fasta)
paired-end data –> such as data from Illumina or MGI-Tech platforms (R1 and R2 files). Be sure to have **R1** and **R2** strings in the paired-end files (not simply _1 and _2; and sample names maynot contain R1/R2 strings)single-end data –> such as data from PacBio, or assembled paired-end data (single file per library or per sample)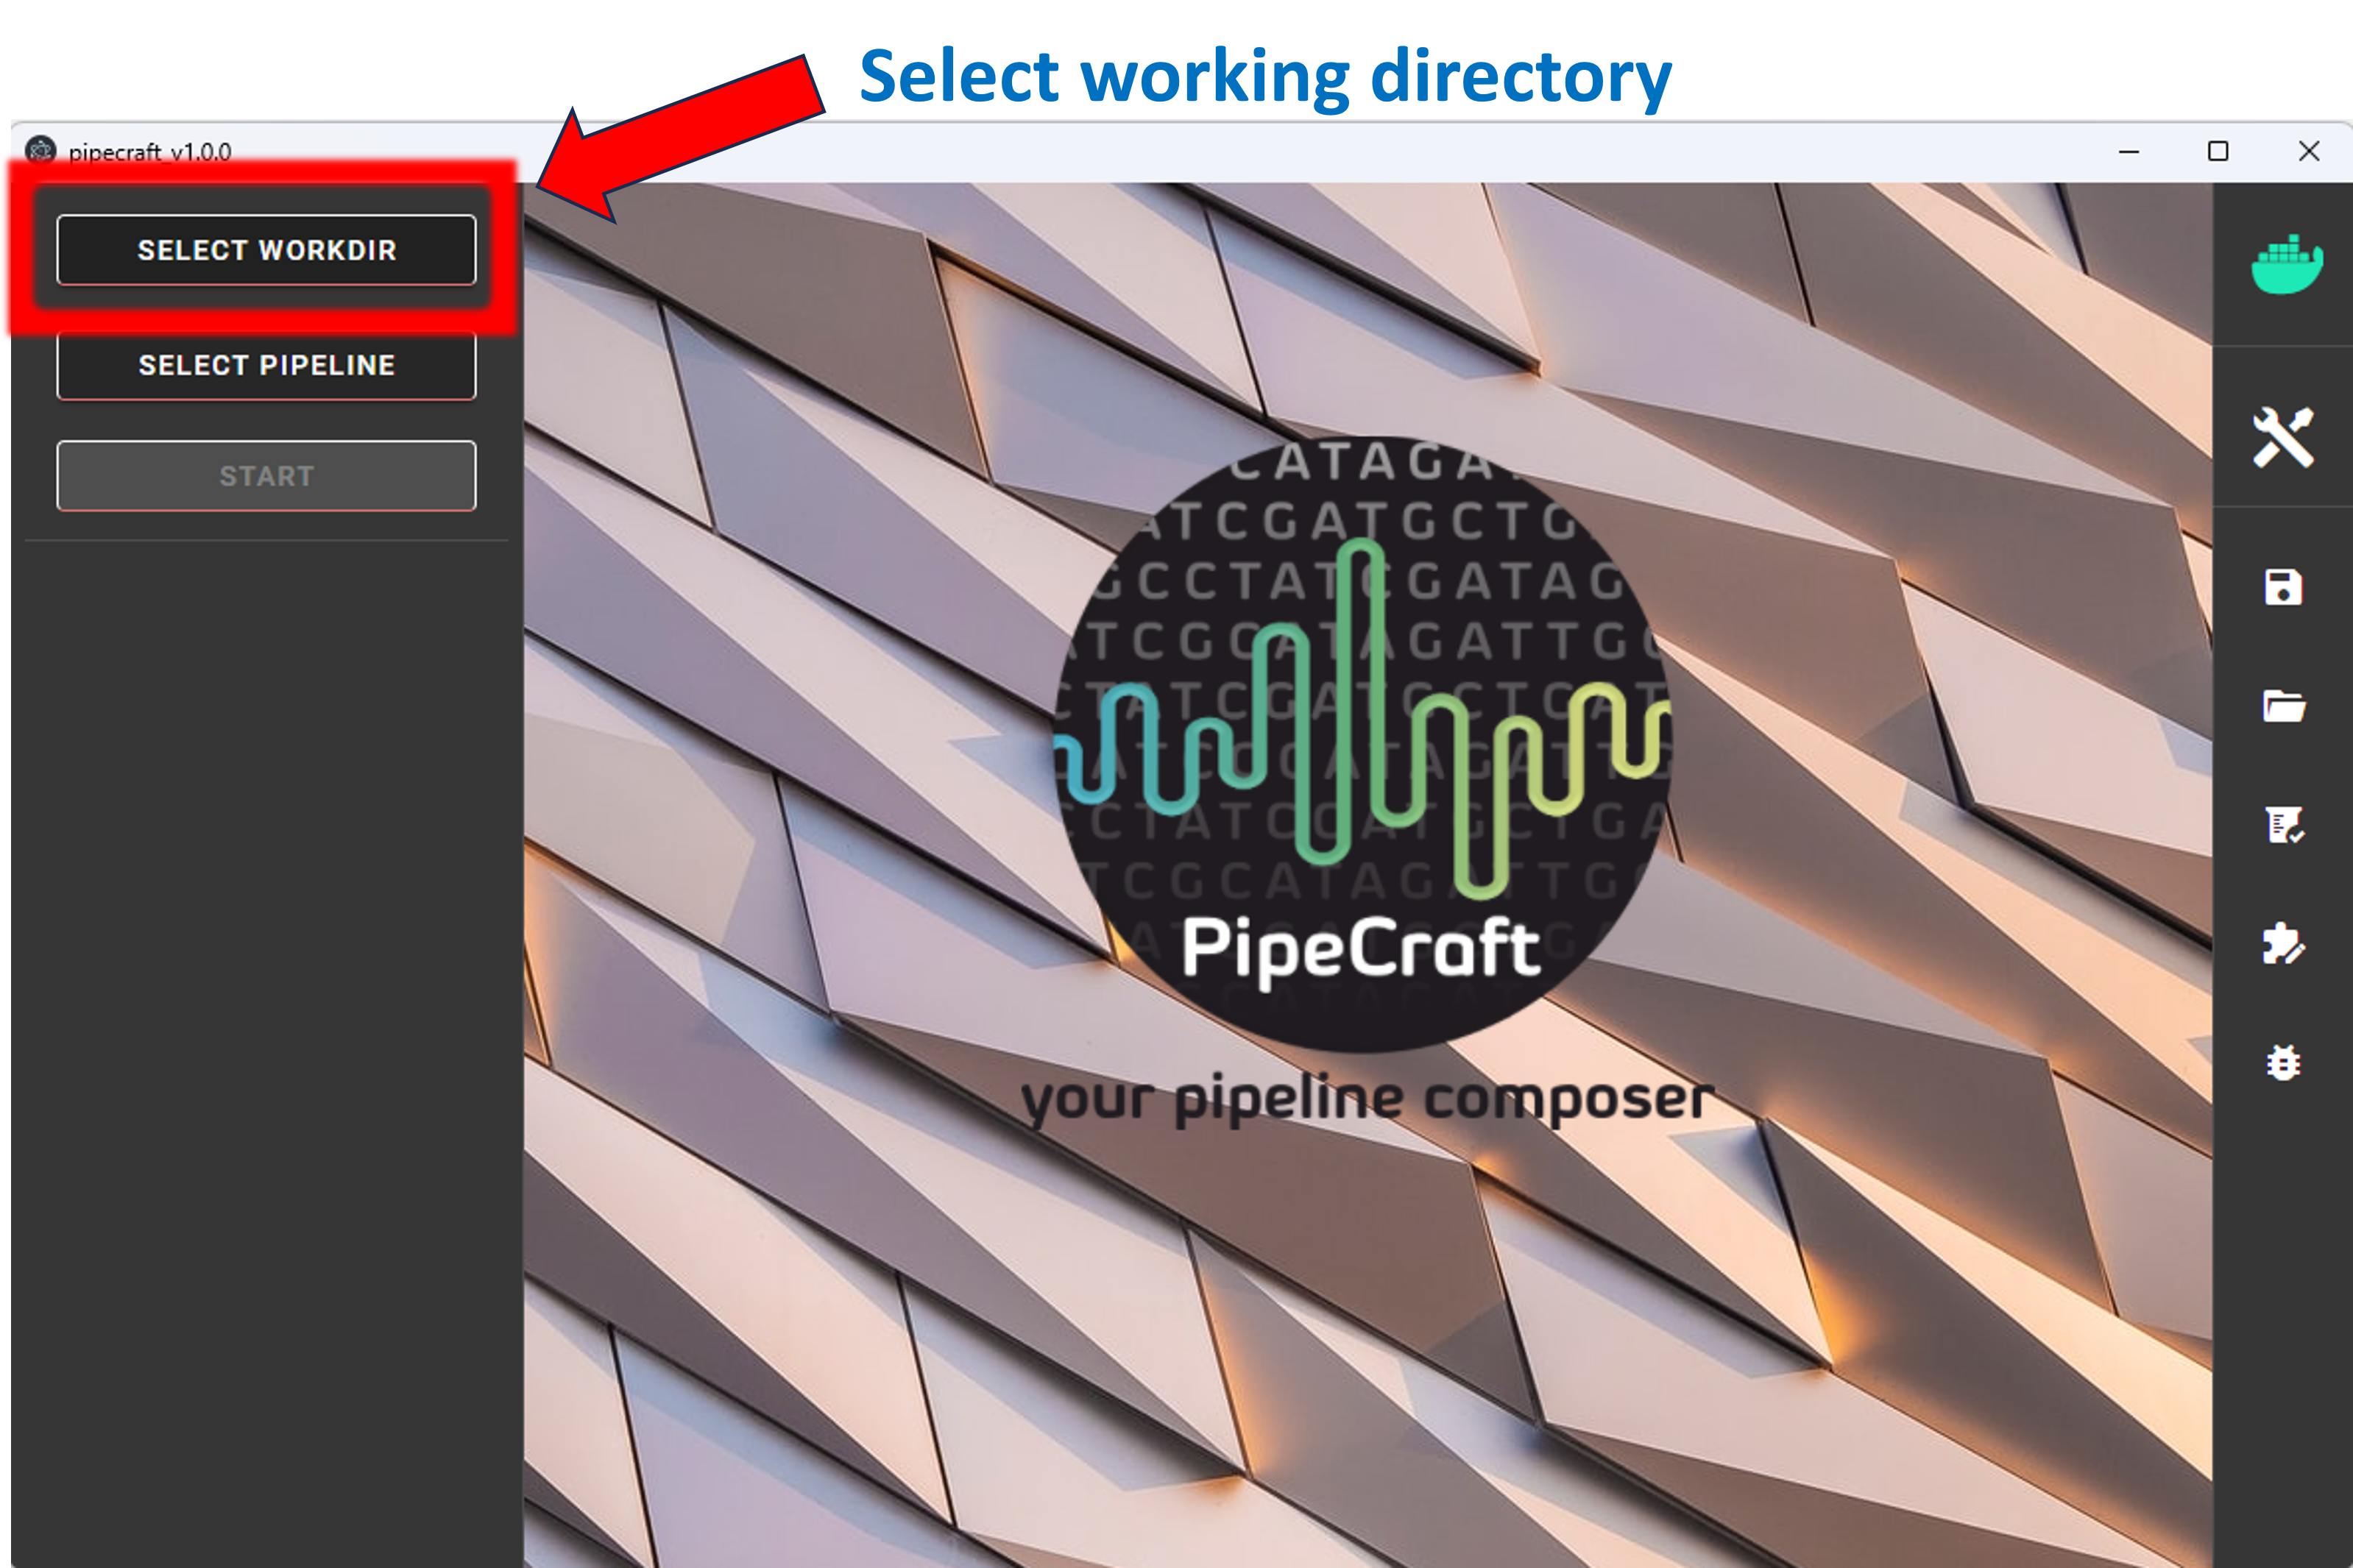
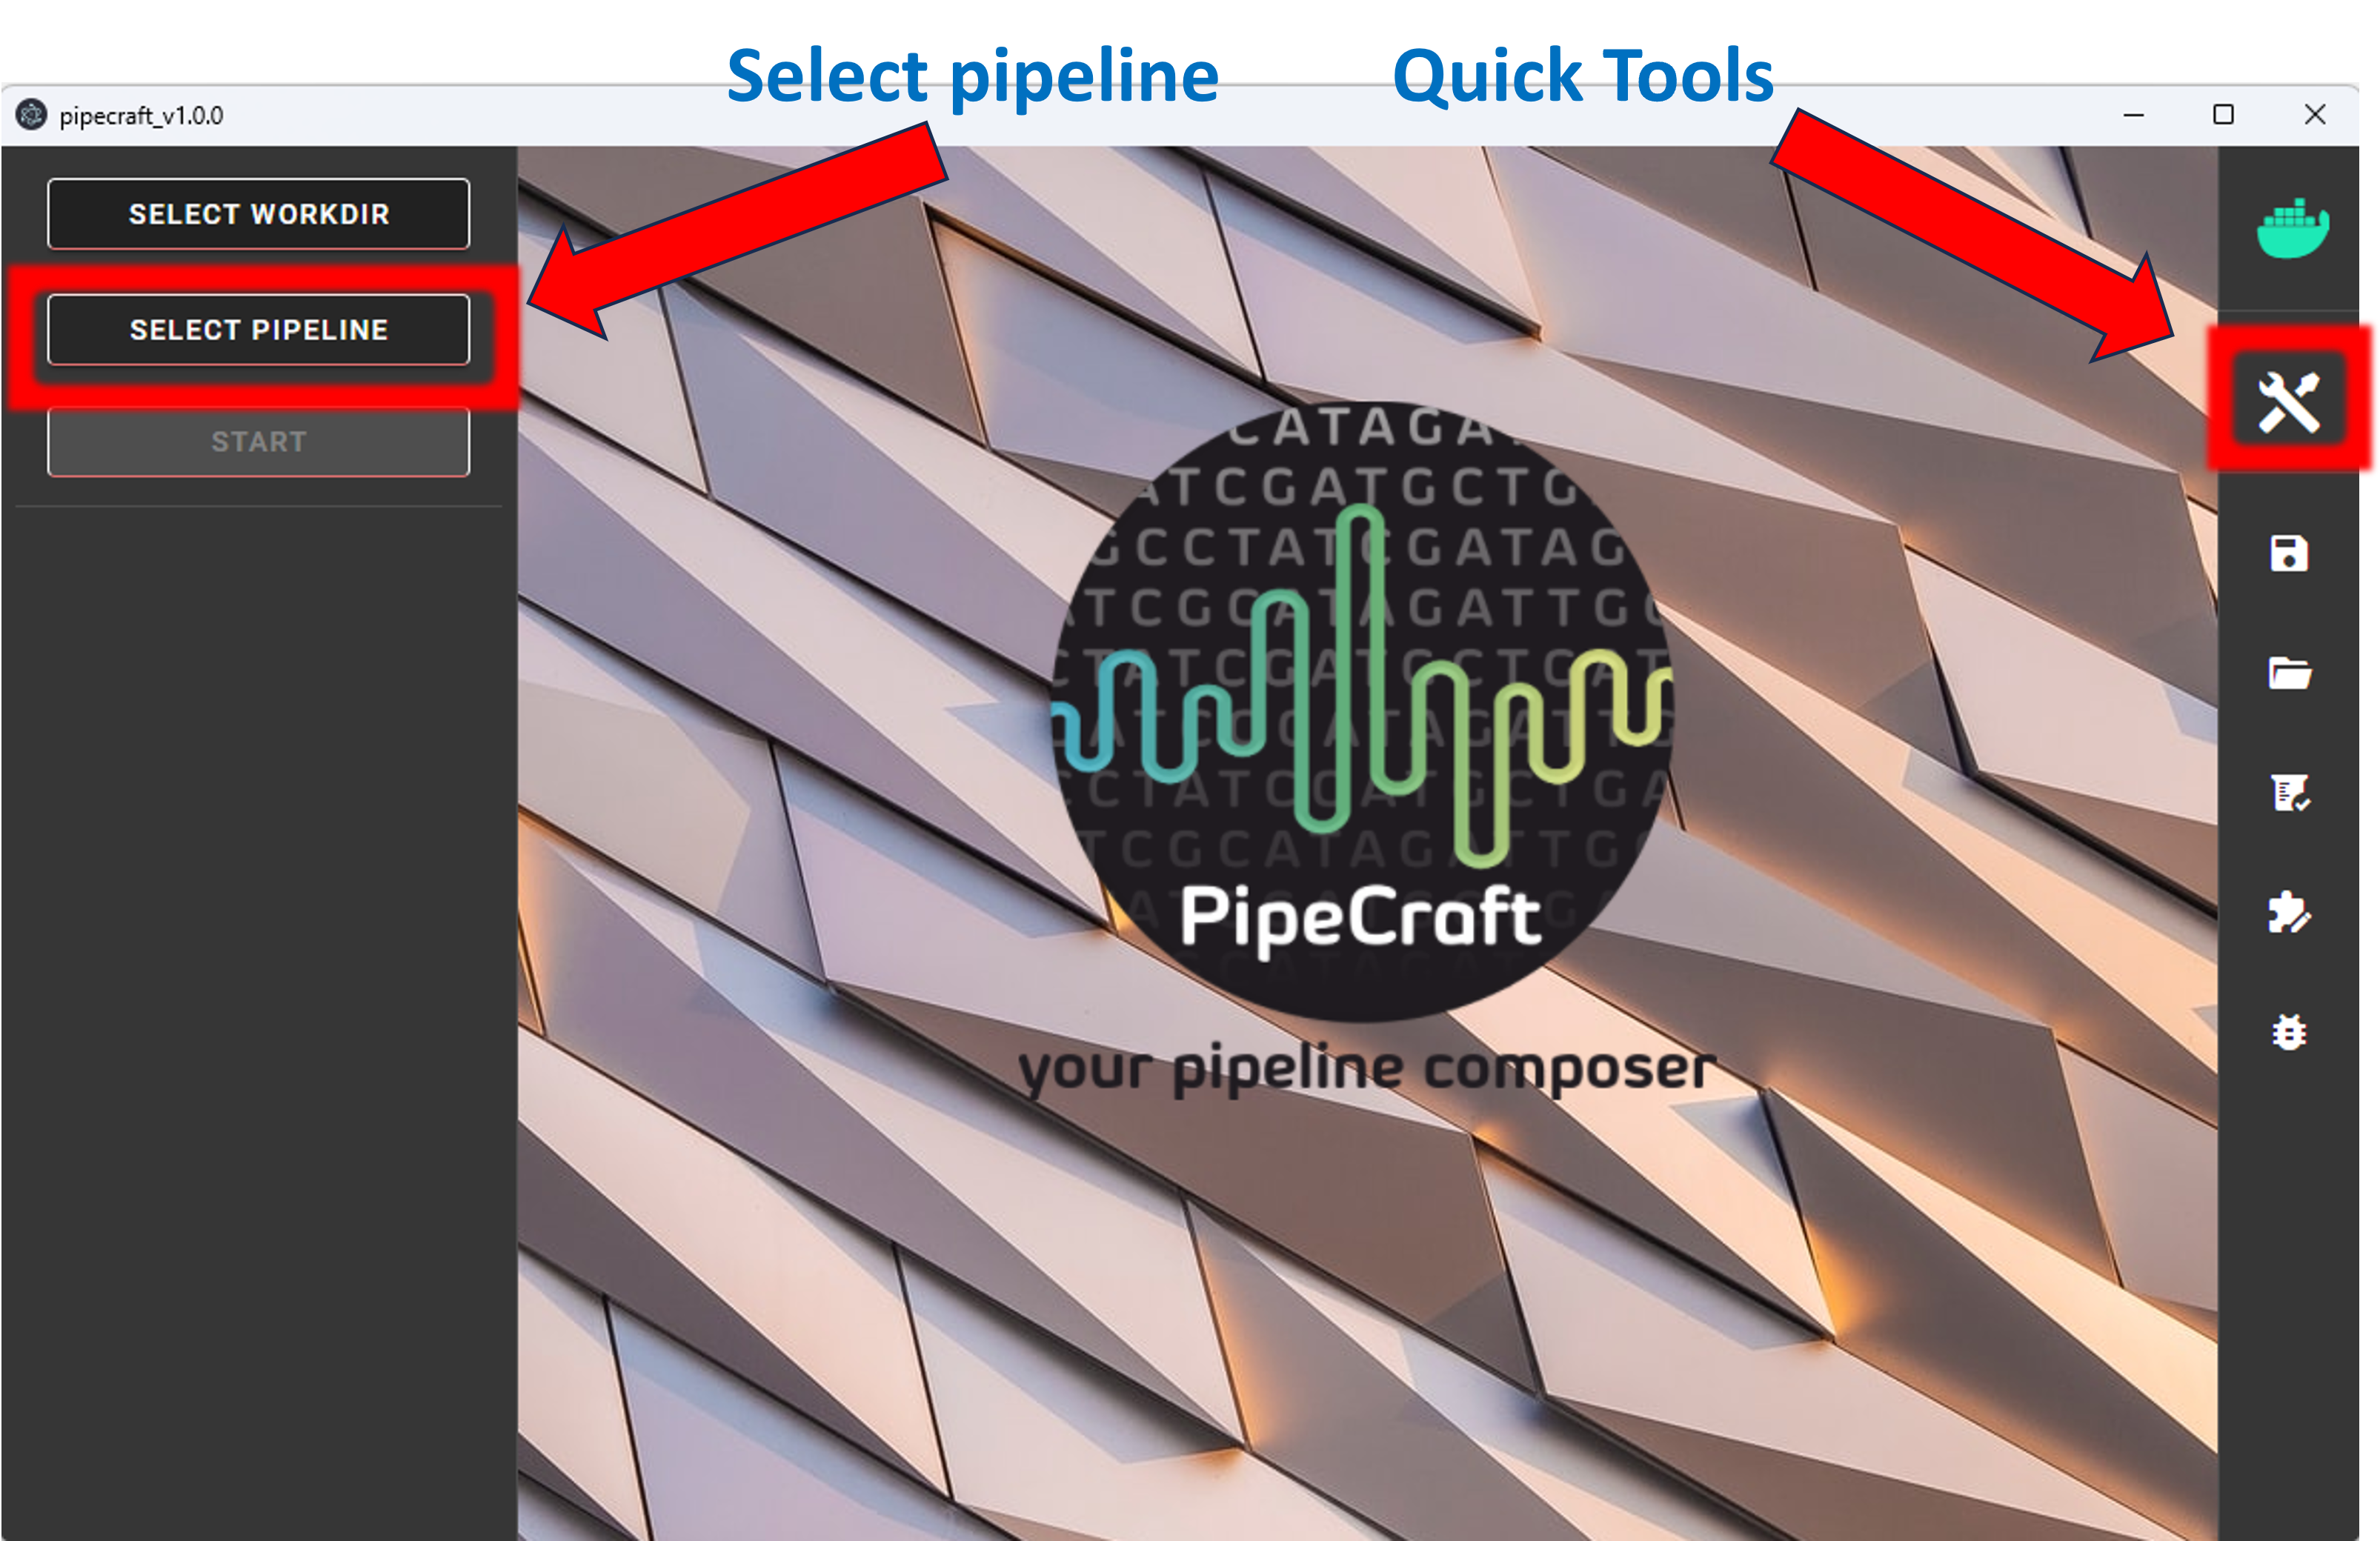
2. SELECT PIPELINE or press Quick Tools button
to select relevant step;
edit settings if needed and start
running the analyses by pressing the START button.
Note
When running ‘step-by-step analyses with Quick Tools’: when one workflow is finished, then press SELECT WORKDIR to specify inputs for the next process to ensure the correct workflow piping.
Warning
The outputs will be overwritten if running the same analysis step multiple times in the same working directory. If needed, edit the default output directory name to prevent that.
Each process creates a separate output directory with the processed files. The README file in the output directory states some of the details about the finished process.
Quality scores and basic statistics screening of the data
Quality and basic statistics screening of the data can be done via QualityCheck panel.
QualityCheck panel implements FastQC and MultiQC to screen the input fastq files.
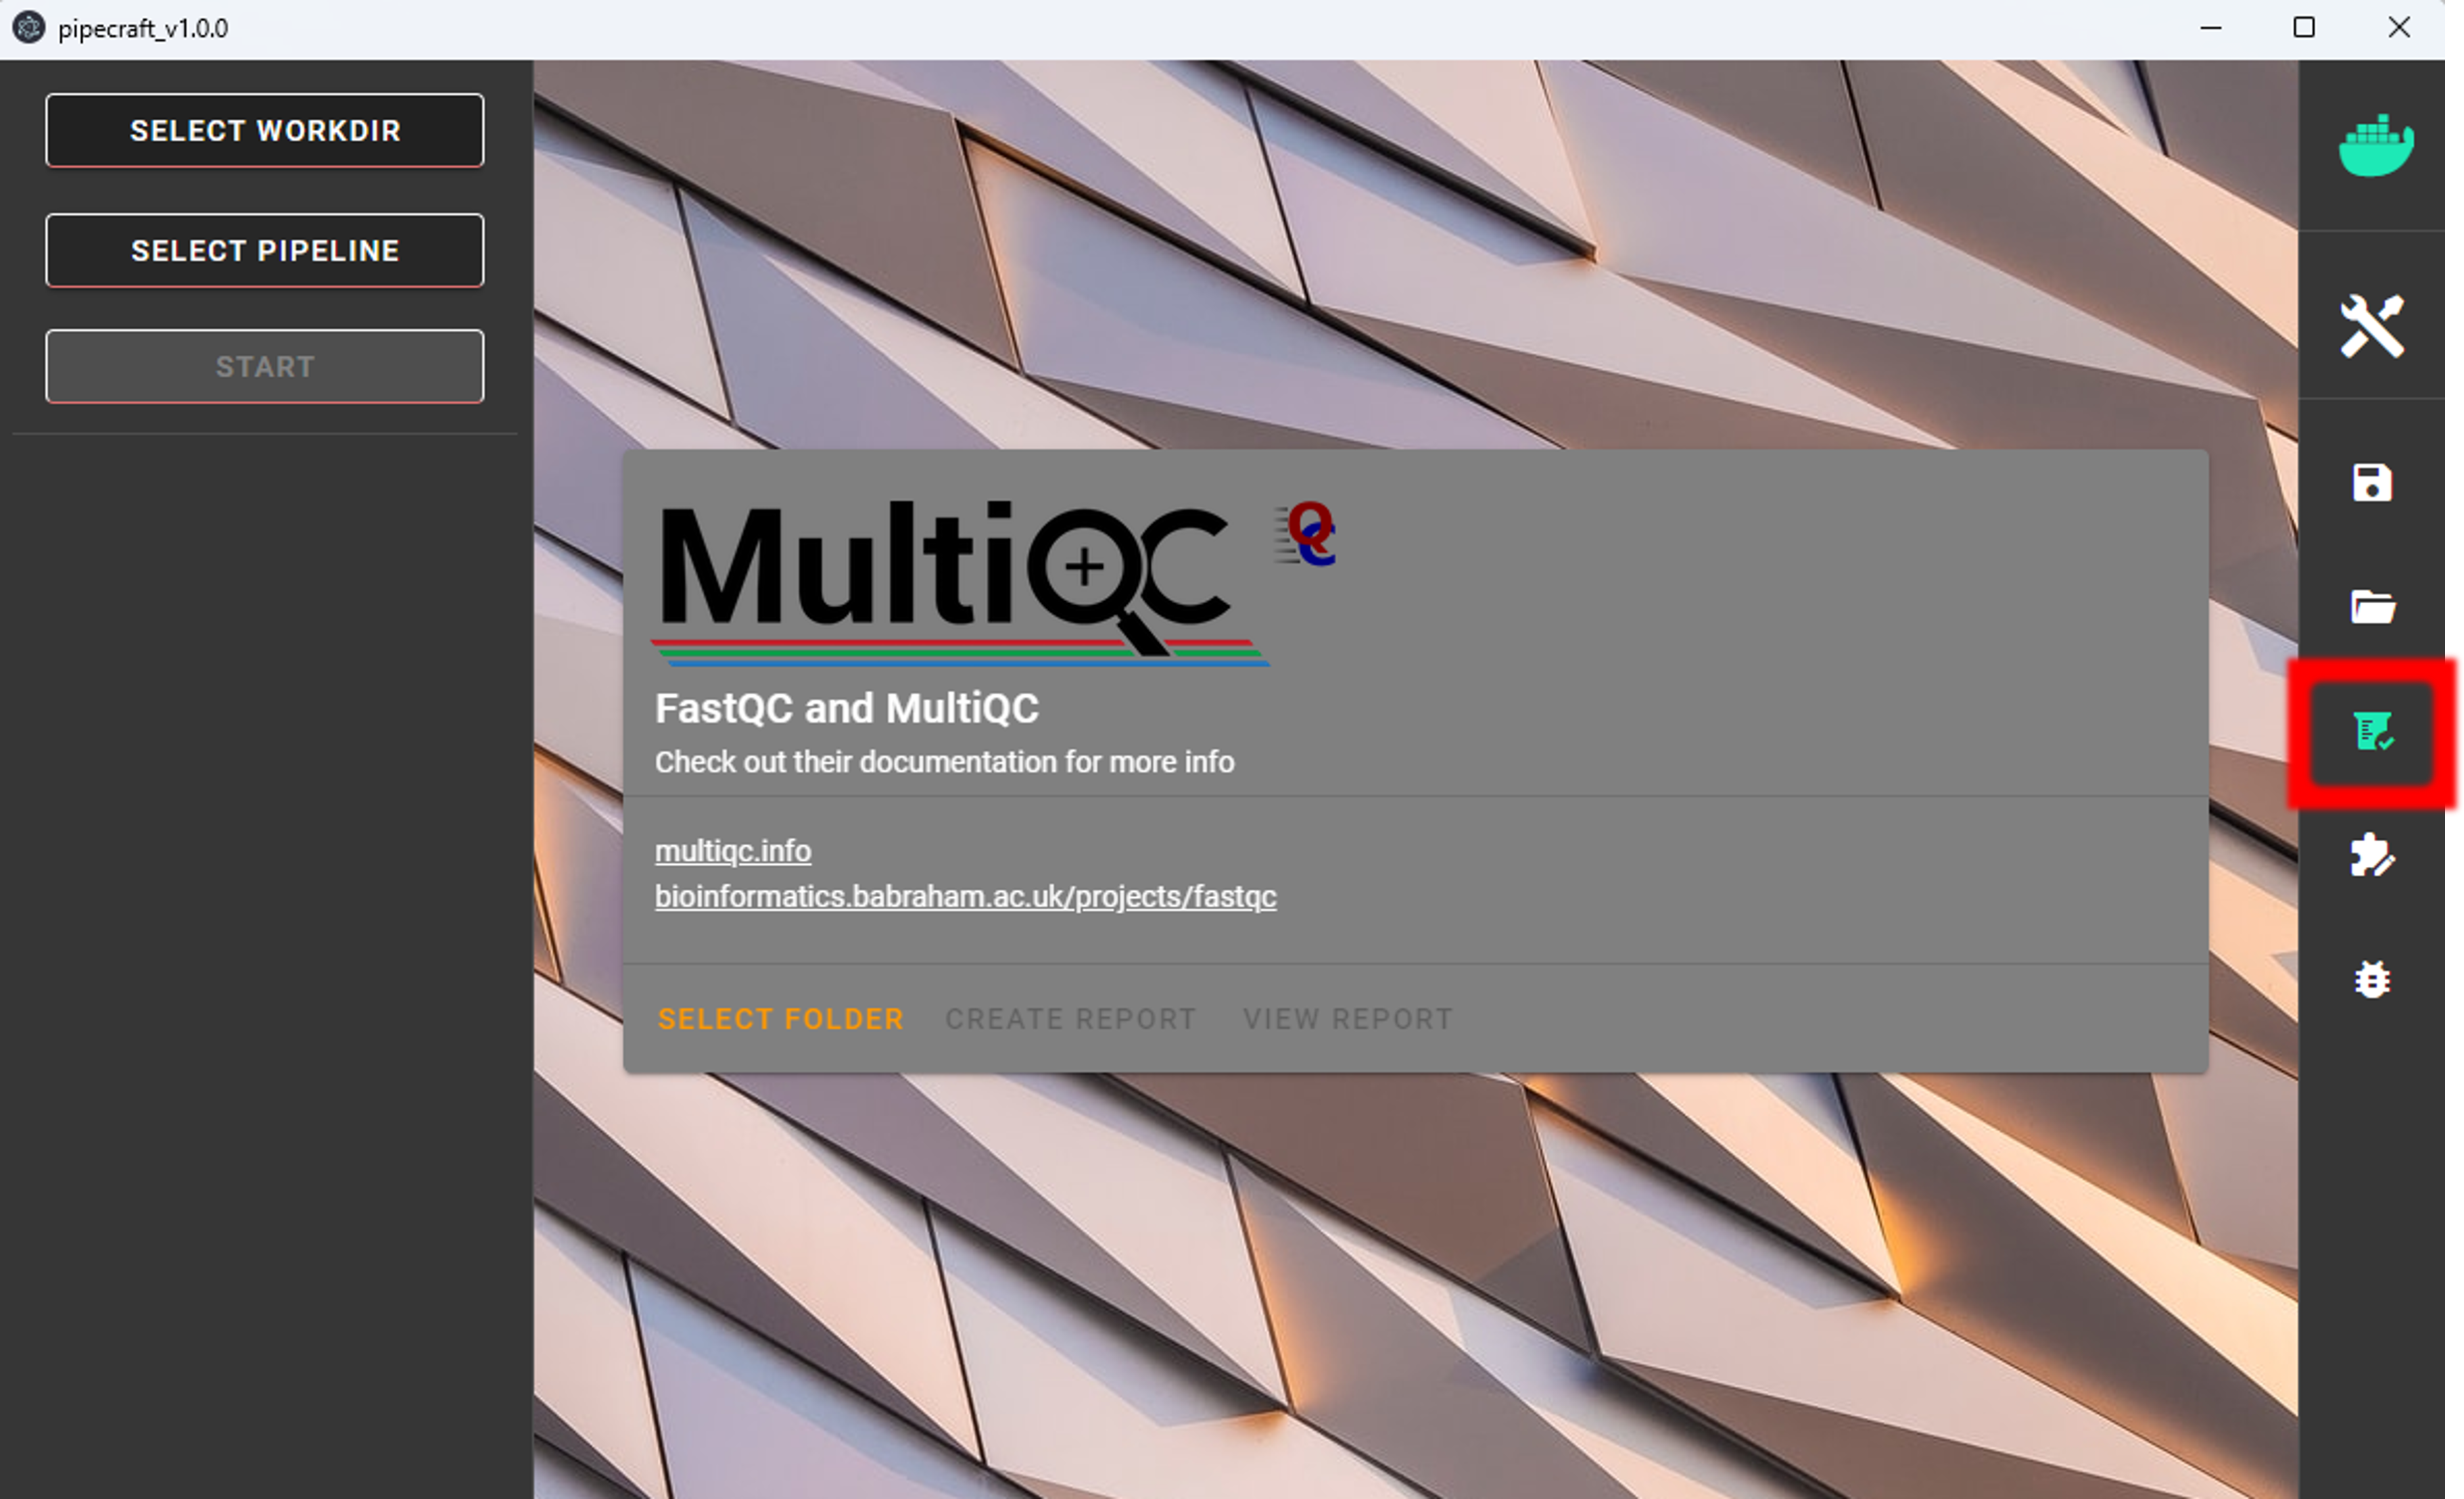
To start:
Select folder (a working directory) which contains only fastq (fastq/fq) files that you aim to inspect.
Press
CREATE REPORTto start MultiQC“LOADING …” will be displayed while the report is being generated


Click
VIEW REPORT. A html file (multiqc_report.html) will open in your default web browser.If the summary does not open, check your working floder for the presence of multiqc_report.html and try to open with some other web browser. Something went wrong if the file multiqc_report.html does not exist (may fail when maximum number of fastq files in the folder is extremely large, >10 000).
Check out “using MultiQC reports” in MultiQC web page.
Note
Note that ‘_fastqc.zip’ and ‘_fastqc.html’ are generated for each fastq file in the ‘quality_check’ directory. These are summarized in multiqc_report.html, so you may delete all individual ‘_fastqc.zip’ and ‘_fastqc.html’ files if those are of no interest.