QuickStart 
Required data formats
There are few specifc requirements for the input data for PipeCraft.
- Paired-end data
must contain **R1** and **R2** strings in the paired-end files,
- sample names may not contain ‘R1/R2’ strings
OK file names:
my_sample_01_R1_L001.fastqandmy_sample_01_R2_L001.fastqNOT-OK file names:
my_R1sample_01_R1_L001.fastqandmy_R1sample_01_R2_L001.fastqormy_sample_01_1.fastqandmy_sample_01_2.fastq
Paired-end reads should have common read identifiers (e.g. _R1/_R2) and file extensions (e.g. fastq/fq) for the reads that are processed together.
- Indexes file for demultiplexing:
Please avoid spaces and non-ASCII symbols in sample names and file paths.
Use at least 2 samples per sequencing run for the pre-compiled pipelines.
- specific directory structure for the pre-compiled pipelines:
If running NextITS pipeline, then follow specific directory structure (see NextITS page here)
If running OptimOTU pipeline, then follow specific directory structure (see OptimOTU page here)
If combining multiple sequencing runs with vsearch, unoise, or DADA2 pipelines, then follow specific directory structure (see here)
- Rerunning the same process:
when rerunning the same process, close any open files from the previous run to avoid conflicts in overwriting the files.
Modify resources usage
Control and limit the resources (such as CPU, RAM) via resource manager.
Software that can utlilize multiple CPUs will use the number of CPUs specified through resource manager.
After editing, press the APPLY & RESTART DOCKER button, so that the changes would take effect.
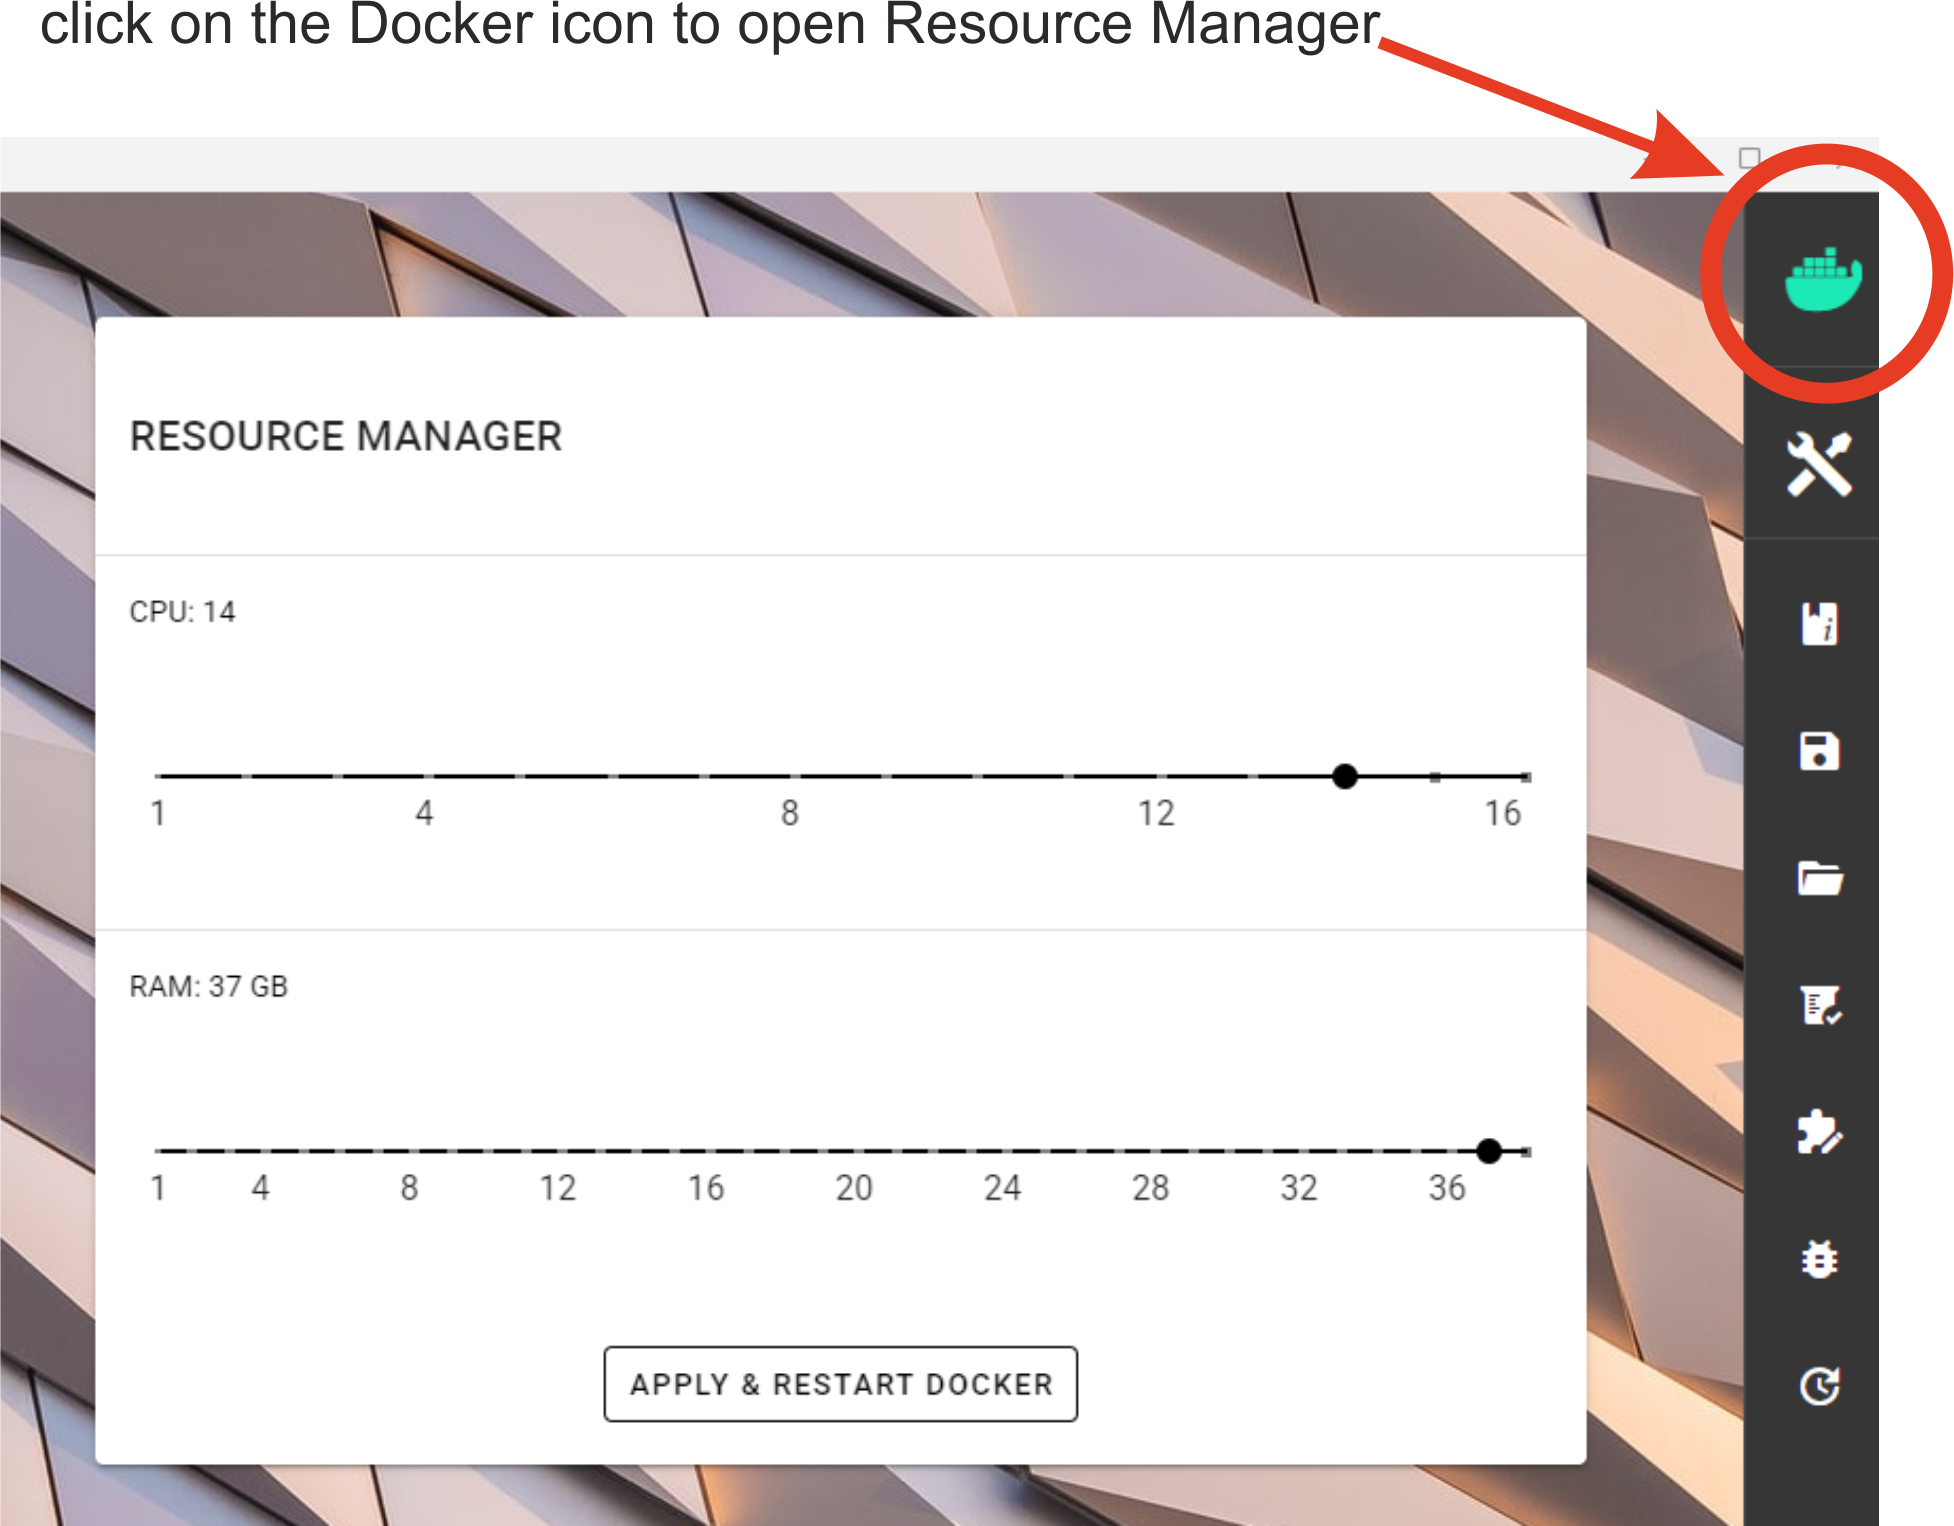
Required amont of allocated resources depends generally on the input data size and the complexity of the analysis. If too few RAM is allocated, then the analysis may fail without any informative ERROR message. If too few CPU cores are allocated, then the analysis may be very slow.
When allocating most of your computer’s resources, please keep in mind that other processes on your computer will be affected.
How to START
1. To START any analyses, you must specify the working directory (WORKDIR) by pressing the SELECT WORKDIR button. E.g., if working with fastq files,
then be sure that the working directory contains only relevant fastq files because the selected process may be
applied to all fastq files in the working directory (unless the process requires specific files to be specified)!
Note
When using Windows OS, the selection window may not display the files while browsing through the directories. But if you know the files are there, then the process will work just fine.
After selecting a working directory, PipeCraft autodetects the file extension in the WORKINGDIR
but doublecheck if those are the files you plan to work with
then specify if the data is paired-end or single-end
paired-end data –> such as data from Illumina or MGI-Tech platforms (R1 and R2 files). Be sure to have **R1** and **R2** strings in the paired-end files (not simply _1 and _2; and sample names maynot contain R1/R2 strings)single-end data –> such as data from PacBio, or assembled paired-end data (single file per library or per sample)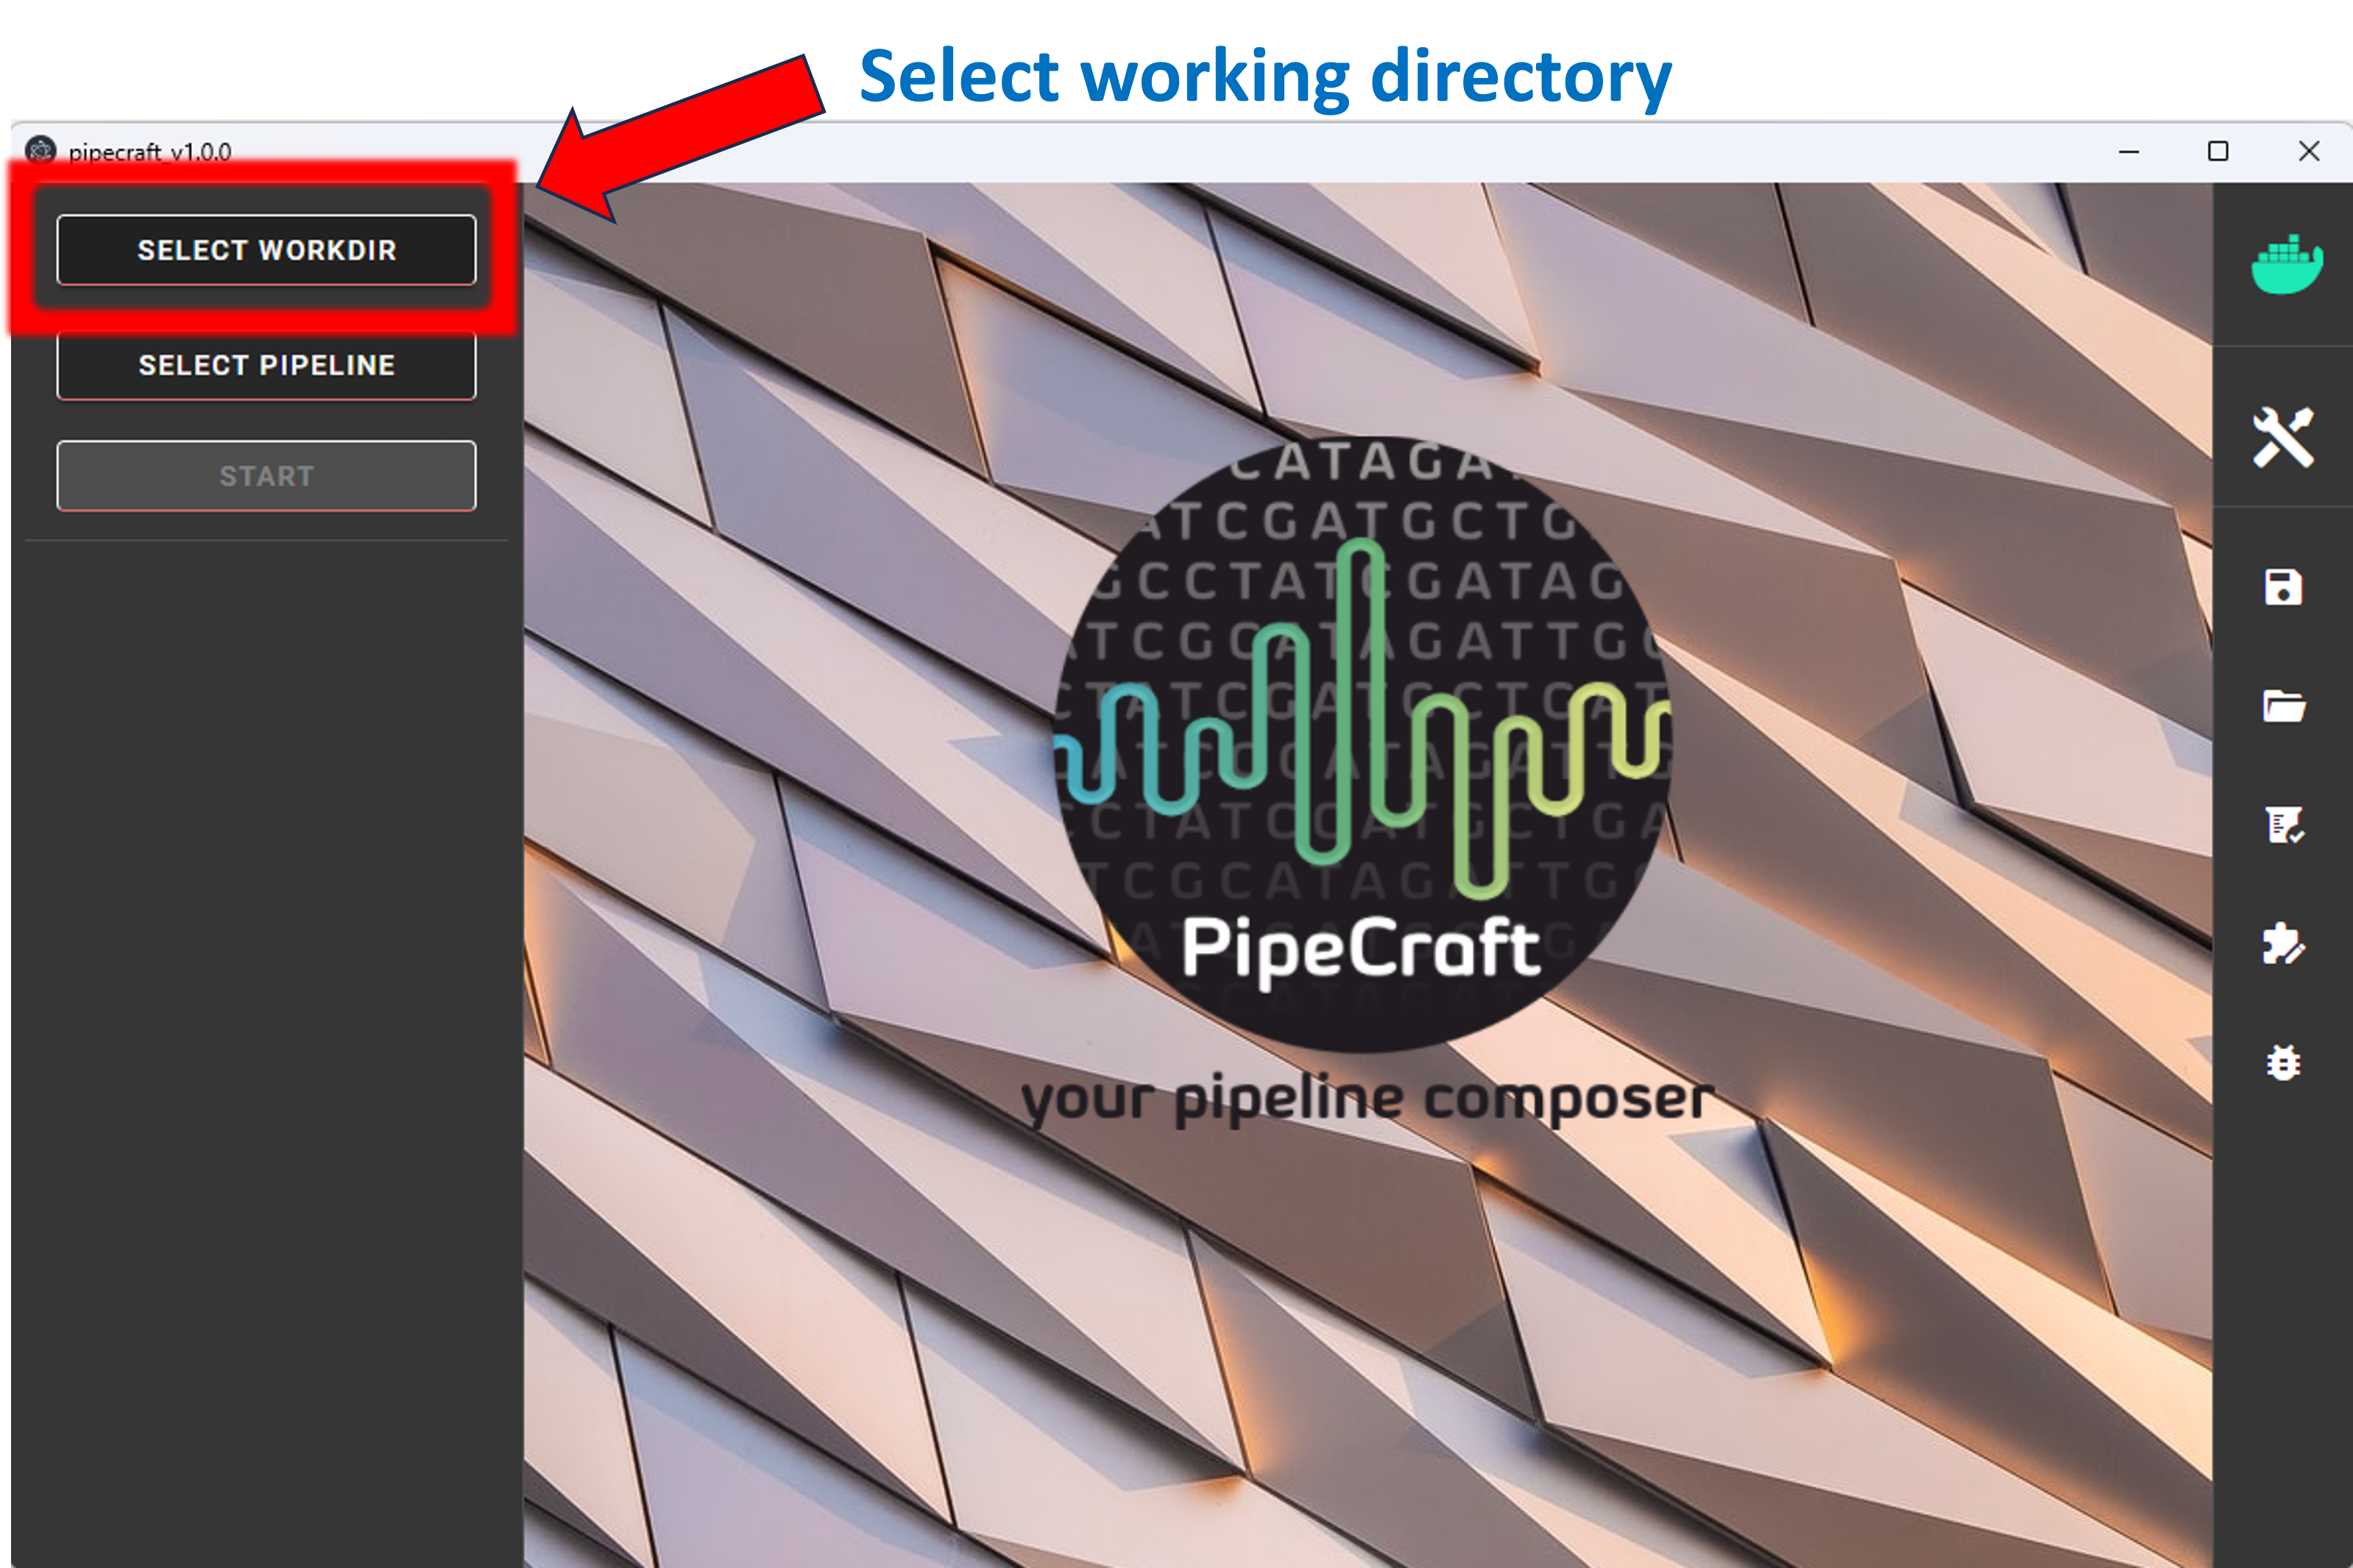
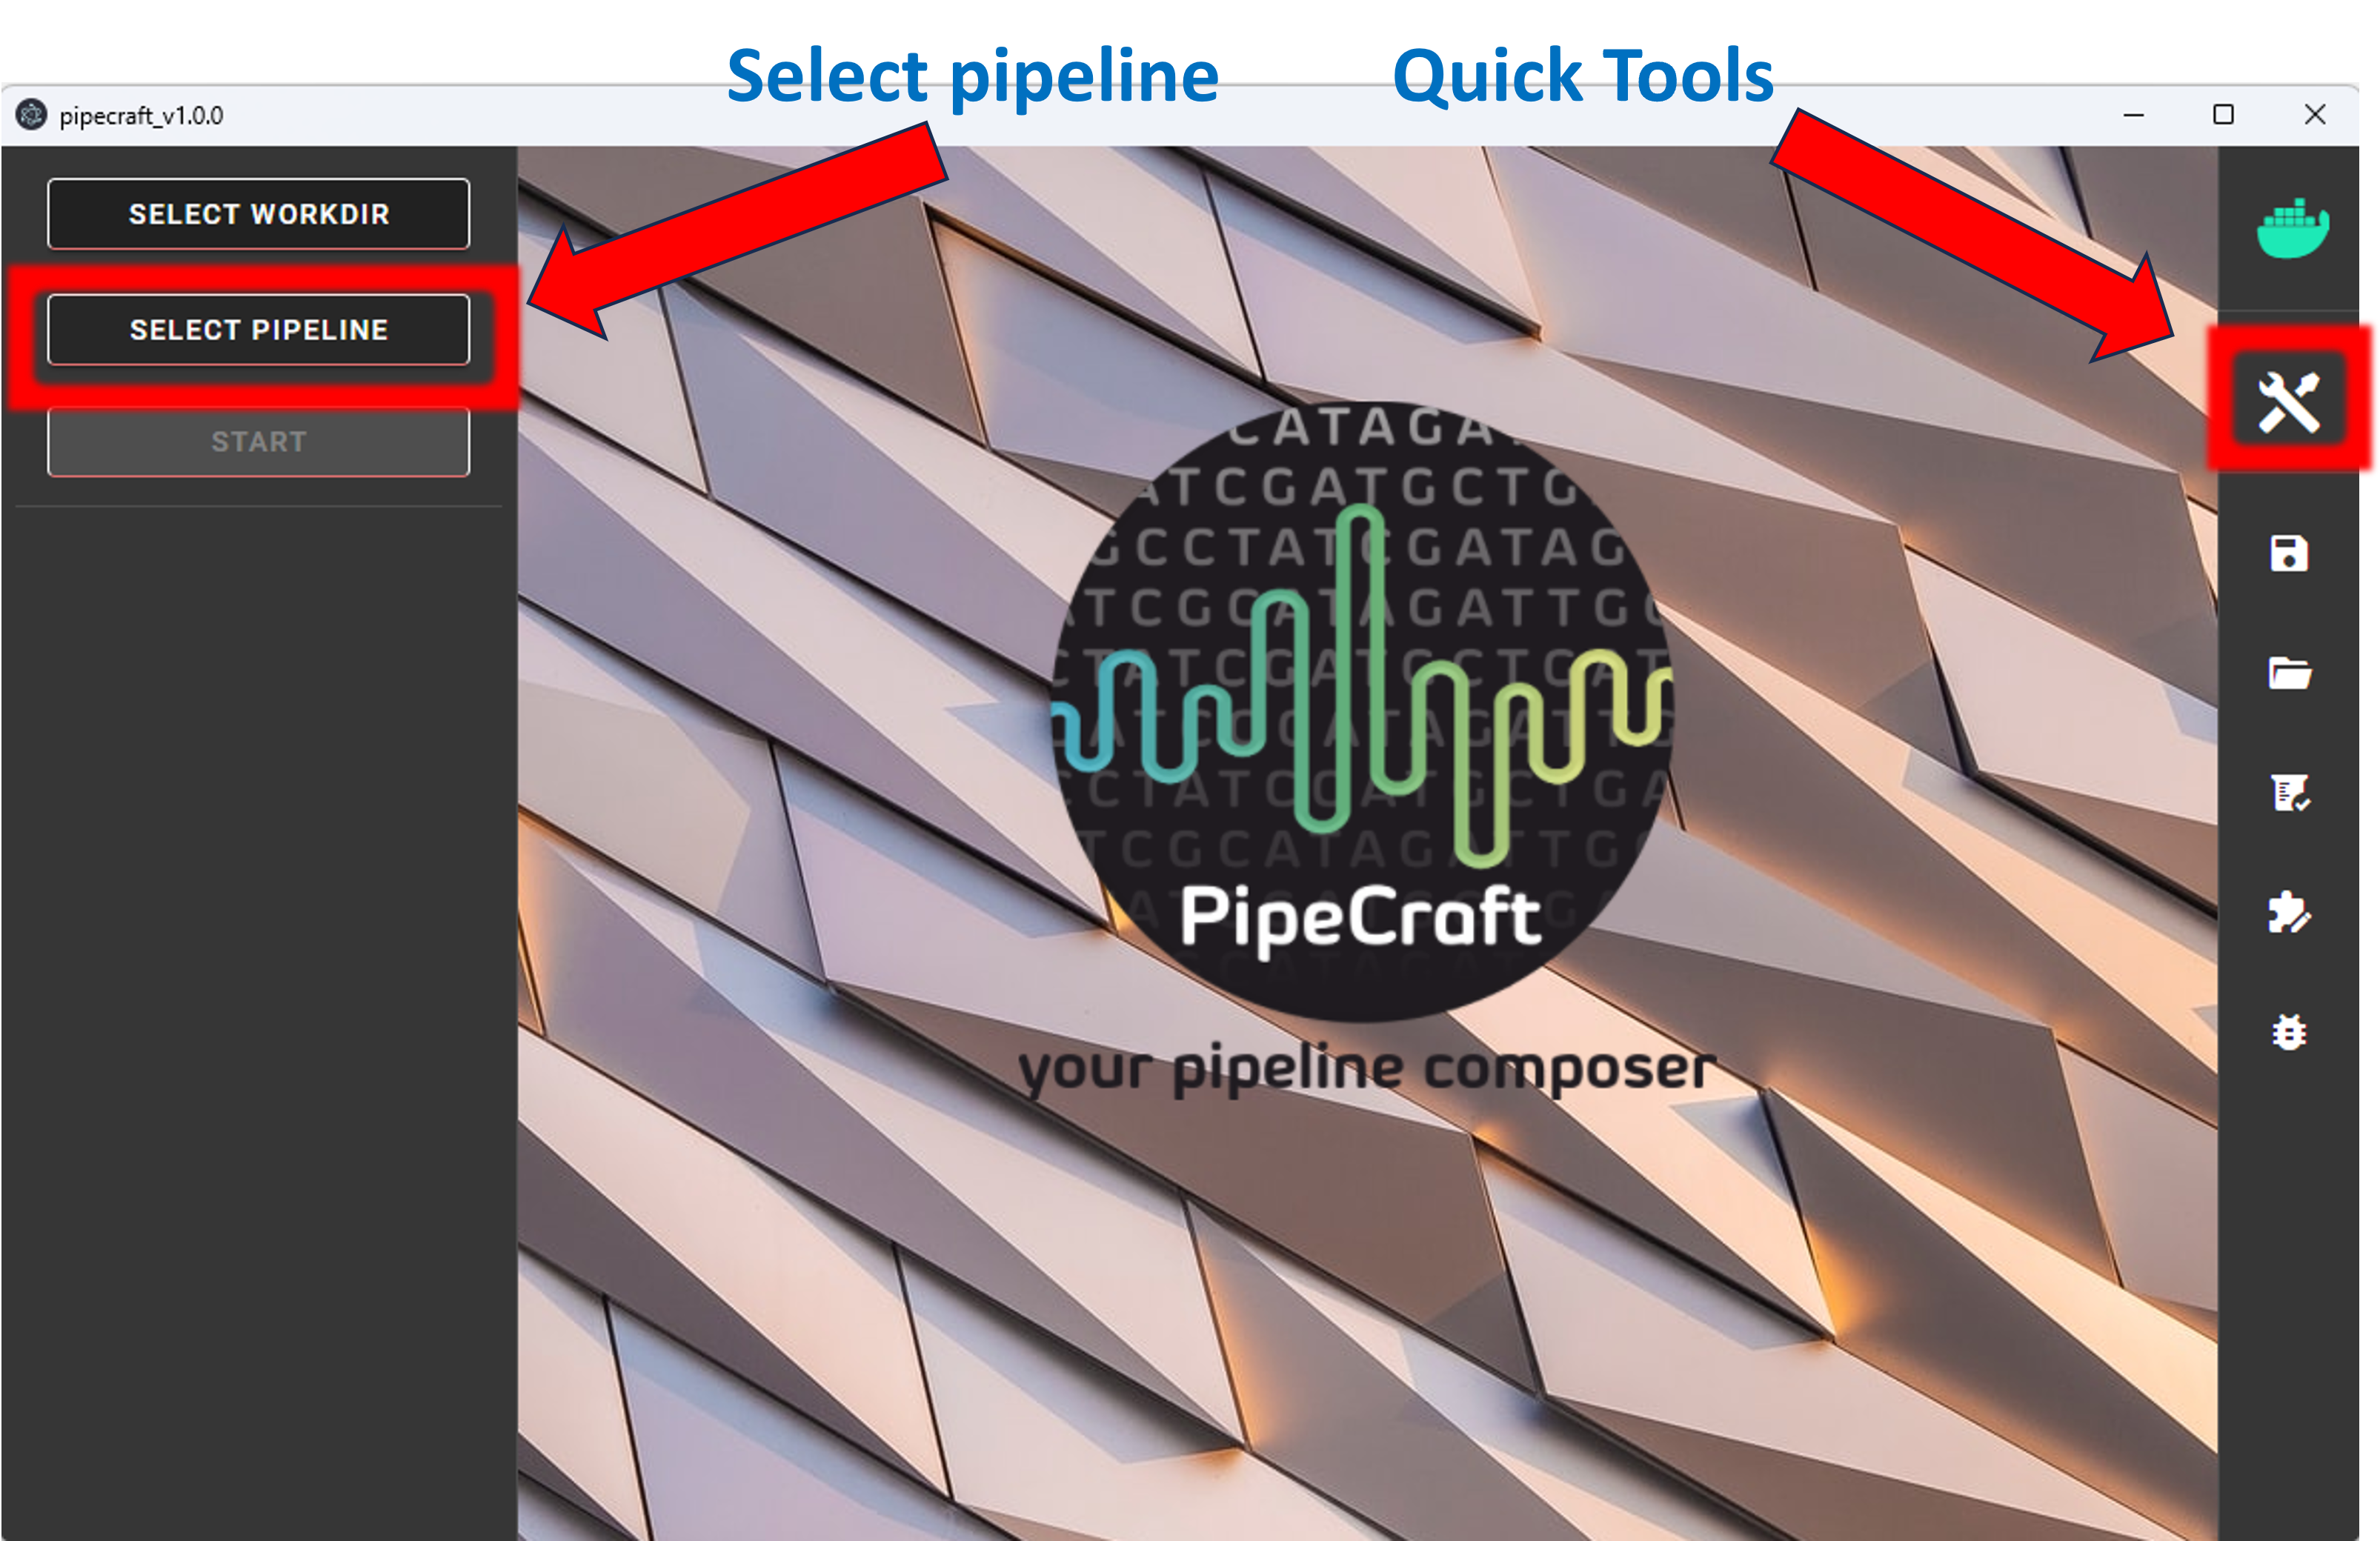
2. SELECT PIPELINE or press Quick Tools button
to select relevant step;
edit settings if needed and start
running the analyses by pressing the START button.
Note
Running ‘step-by-step analyses with Quick Tools’:
when one workflow is finished, then press SELECT WORKDIR
to specify inputs for the next process to ensure the correct workflow piping.
Note
Note that a pipecraft2_last_run_configuration.json file will be generated into the working directory upon starting a workflow.
As the file name says, it is the workflow configuration file for your last PipeCraft run in this working directory.
This JSON file can be loaded into PipeCraft2 to automatically configure your next runs exactly the same way.
Warning
The outputs will be overwritten if running the same analysis step multiple times in the same working directory. If needed, edit the default output directory name to prevent that.
Each process creates a separate output directory with the processed files. The README file in the output directory states some of the details about the finished process.
Save workflow
Once the workflow settings are selected, save the workflow by pressin SAVE WORKFLOW button on the right-ribbon.
Note
starting from version 0.1.4, PipeCraft2 will automatically save the settings into selected WORKDIR prior starting the analyses (file name = “pipecraft2_last_run_configuration.json”)
Important
When saving workflow settings in Linux, specify the file extension as json (e.g. my_16S_ASVs_pipe.json). When trying to load the workflow, only .JSON files will be permitted as input. Windows and Mac OS automatically extend files as json (so you may just save “my_16S_ASVs_pipe”).
Load workflow
LOAD WORKFLOW button on the right-ribbon and select appropriate JSON file.SELECT WORKDIR and after that may run PipeCraft.Note
Prior loading the workflow, make sure that the saved workflow configuration has a .json extension. Note also that workflows saved in older PipeCraft2 version might not run in newer version, but anyhow the selected options will be visible.